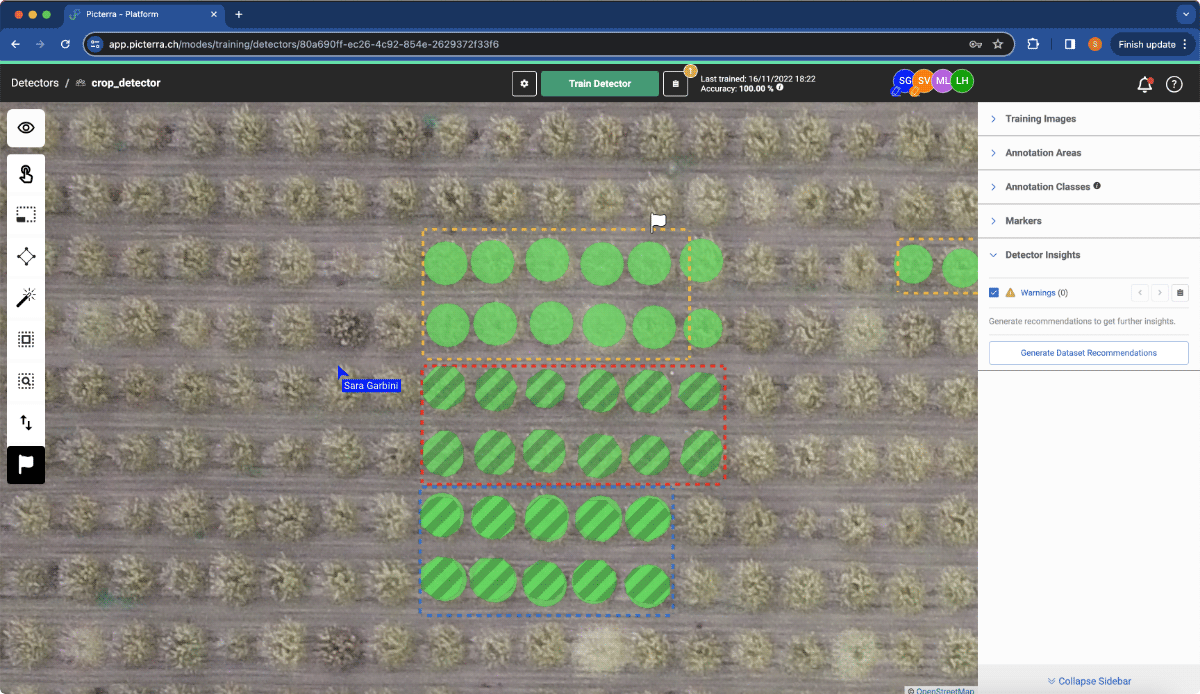
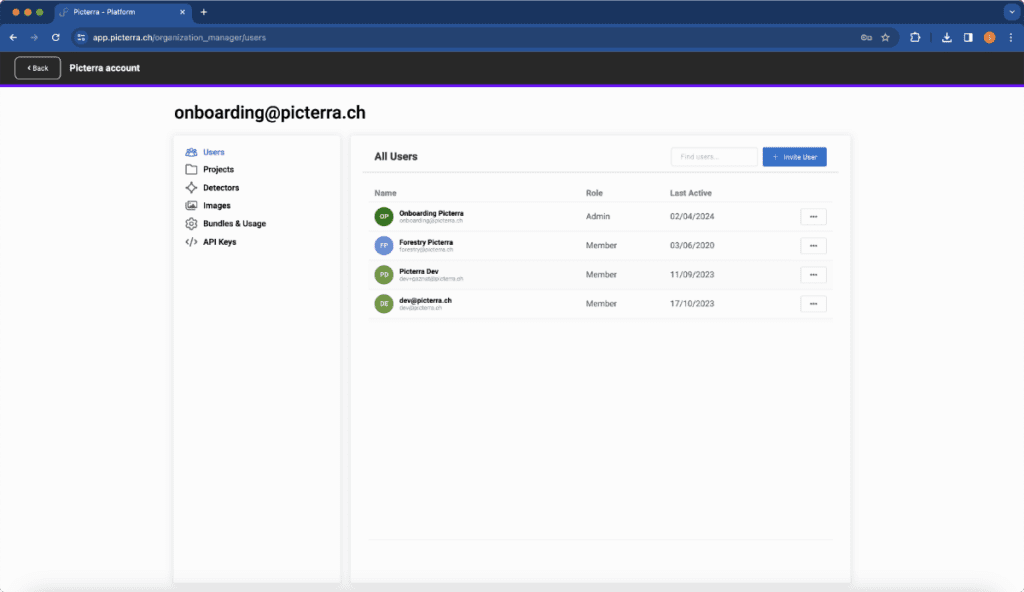
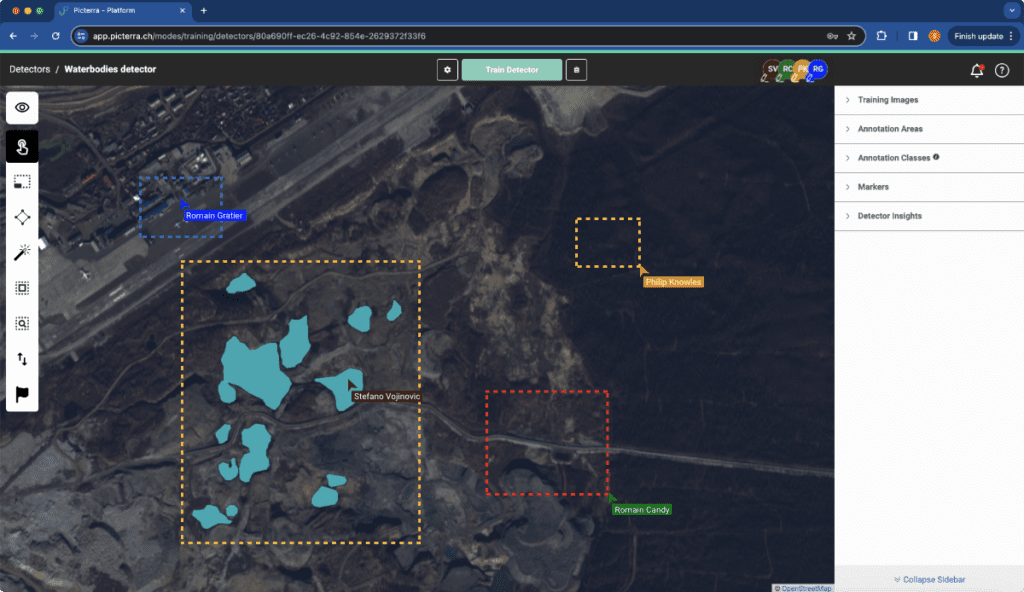
Collaboration

How to collaborate within Picterra?

Oftentimes your team needs multiple users sharing imagery and projects, adding and reviewing annotations, or evaluating and improving detection results.

With this in mind, the Picterra platform provides different features that make collaboration a breeze:

  • Inviting and managing colleagues with a simple dedicated interface
  • Sharing projects, remote imagery sources, and detectors within the team
  • Allowing multi-user detector training, with real-time model updates and chat functionality

Explore collaboration in an interactive tour:

Users & roles management

Every Picterra account is affiliated with an organization, which is overseen by at least one administrator. These administrators have access to a dedicated interface for managing users, resources, processing bundles, and usage through the organization manager page.

Imagery server sharing

Organization members can share one or more of their imagery servers (e.g. a company-wide WMS). This will allow all members to import rasters from this source.


Careful in editing

Users should be careful when editing/deleting an imagery server that is shared because this will affect colleagues using it too

Shared server

All shared imagery servers will have the "collaboration" icon next to the name. A server can be shared, setting it as "Public" for your organisation

Project permissions

Once you have created a project, you can edit its permissions. From the project list, click “Manage access” to share or edit the permission settings, as shown in the image below. You can also change user’s permissions in the organization manager interface.

A user can have 3 types of permissions on a given project:

  • View – can use the rasters inside the project (for training or predicting), but not edit them nor the project itself
  • Modify – can do any action on the project and the rasters within, except managing permissions
  • Manage – allows editing the permissions themselves on the project; this is the default for the user that creates a project

From the “Project Access” popup, you can:

  • add and remove users and set their access level
  • set an organization-wide access policy: this will grant the chosen permission to all users (in case of user and organization level permissions, the highest is taken)

It’s important to note that when managing permissions, each project must have at least one user with “Manage” permissions, or this permission must be assigned to the organization.

Detector collaboration

Picterra platform allows multiple users to work on a specific detector simultaneously. This collaboration feature is supported for all detectors shared across the organization, allowing users to train and annotate the detector together.

Sharing a detector

Once you have created a detector, you can edit its permissions. From the detectors list, click “Manage access” to share or edit the permission settings, as shown in the image below.

A user can have 2 types of permissions on a given detector:

  • Modify – can do any action on the detector, except managing permissions
  • Manage – allows editing the permissions themselves on the detector; this is the default for the user who creates a detector

Active users

The users working on the same detector are shown in the top bar.
The users currently modifying or creating new outlines will present a pencil icon next to their name.
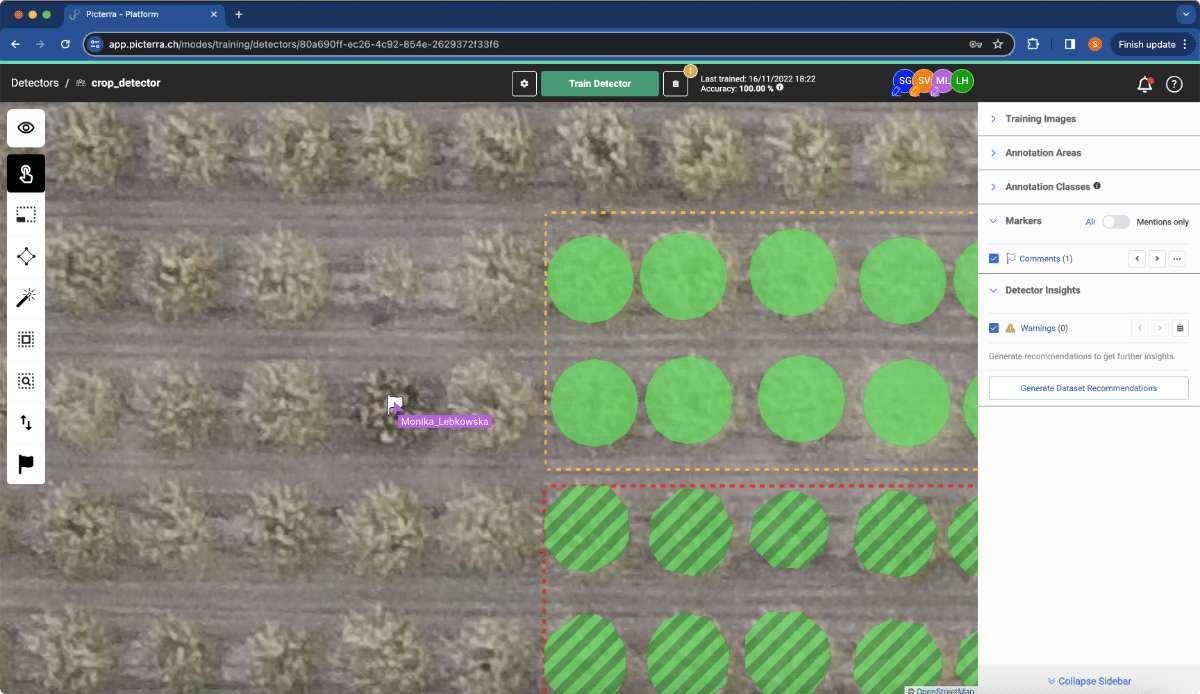
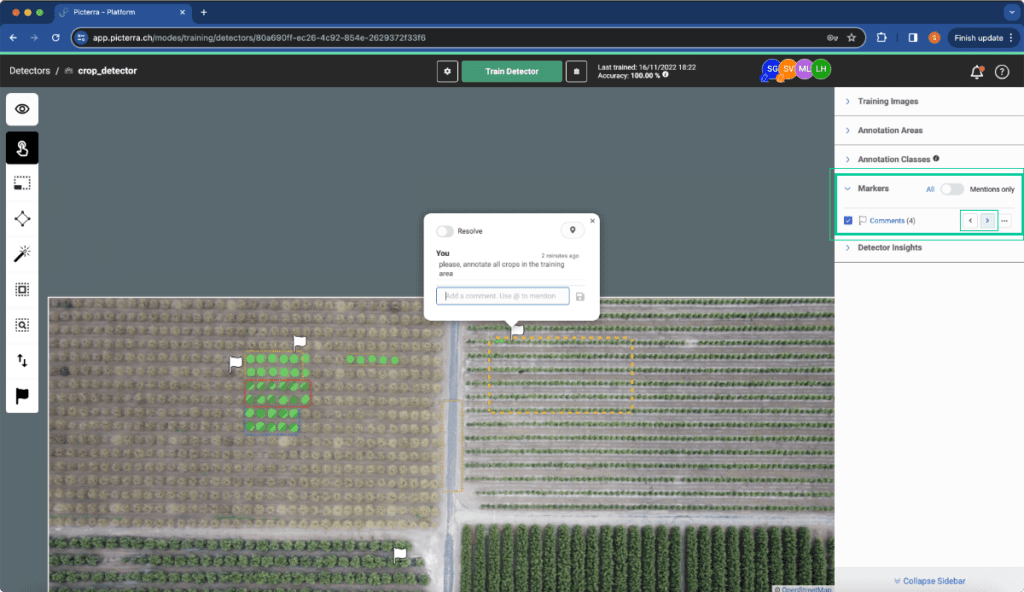
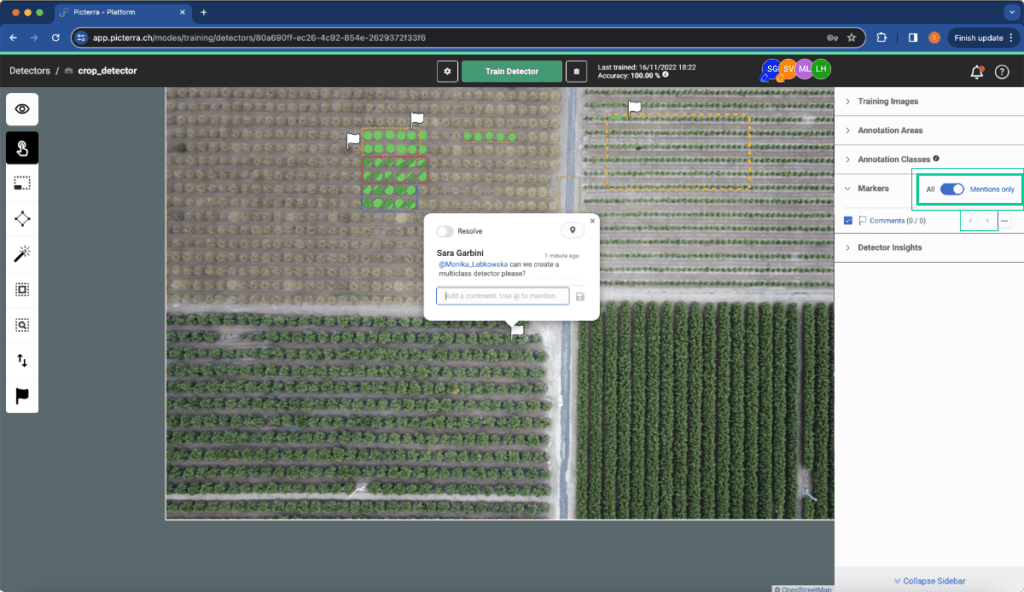
Live communication

The markers tool can be used to communicate and coordinate tasks across the team. The users can be tagged (prefix the user with ‘@’). Tagged users are notified by email that action is requested on a specific detector. The markers can be resolved once the conversation is over.

Marker-based collaboration

When training a detector, you can use markers to mention colleagues and ask them for input on specific areas or assign them tasks.

Markers allow you to attach a comment to a location on an image. You can mention a colleague in the comment by typing ‘@username’ and they will get an email notification.

A marker can also be resolved which means it is removed from the map.

Markers navigation

When you are inside a detector, you can easily navigate through its markers using the ‘Markers‘ panel:

You can also restrict the navigation to the markers you were mentioned in.

Markers import / export

See the dedicated markers page for instructions on how to import/export markers.

Collaboration flows

We designed markers with collaboration in mind. Since they are quite flexible, it’s up to you to define your ideal flow, but here are two example flows we find useful.

Tasks assignment

You can use mentions in markers to assign tasks to colleague. The flow would look like this:

  • Create a marker
  • In the comment, mention a colleague: ‘@Jeff can you annotate in this training area ?
  • Jeff will get an email notification
  • Once the task is done, Jeff can resolve the marker, which will remove it from the map

Detector review

Another use of markers is for detector review. Once you have some detections, you can mention your colleagues in marker comments to ask them for input.